Giddy's Bits & Pieces, an Etsy shop, is now open for business!
https://www.etsy.com/shop/GiddysBitsandPieces
Fun things for you, for gifts, for home.
Check in often for new items!
Sunday, June 7, 2015
Saturday, March 9, 2013
A-Wing Gaiters - A Tutorial
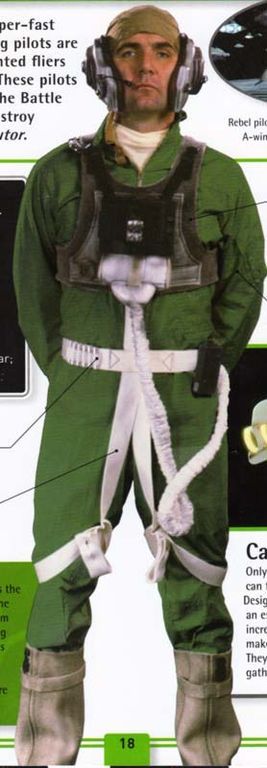
What are A-Wing Gaiters? They're gaiters worn by pilots of, well, A-Wings. No, I don't have this costume, but I've made three pairs of these gaiters, so I thought it was time to share the knowledge.
You will need:
1.5 yards bottomweight twill, khaki colored
Thread
1 package beige sew-in velcro (30 inches)
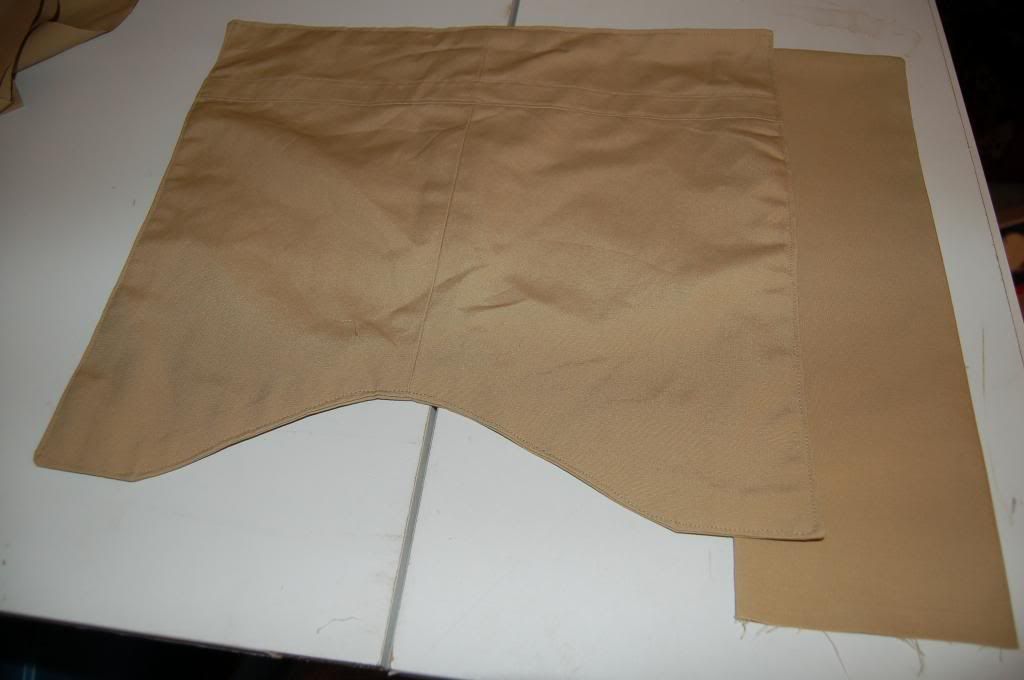
1. Cut eight (8) gaiter pieces (4 per gaiter)
2. Cut two tongues on the fold (1 per gaiter). If you don't have enough fabric to cut on the fold, you can cut it the regular way and sew the top instead).
3. Cut two strips 18 inches long and 1.5 inches wide (Approximately, I used my yardstick for a pattern)

4. Sew center front seams; press open. You will now have four pieces, we'll call them gaiters and linings, and you have two of each.

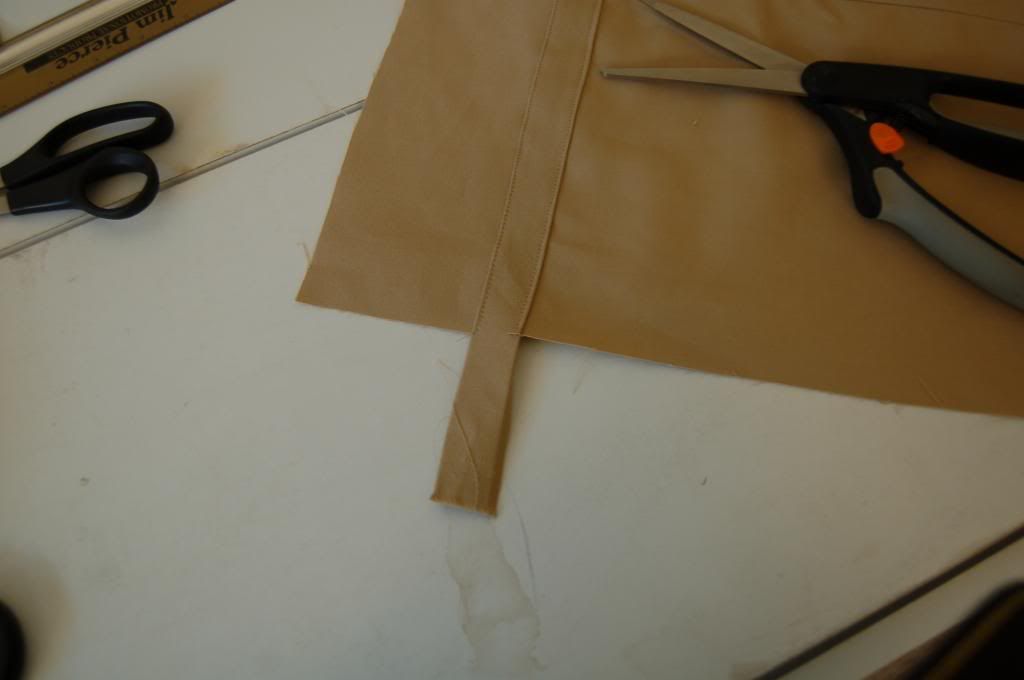
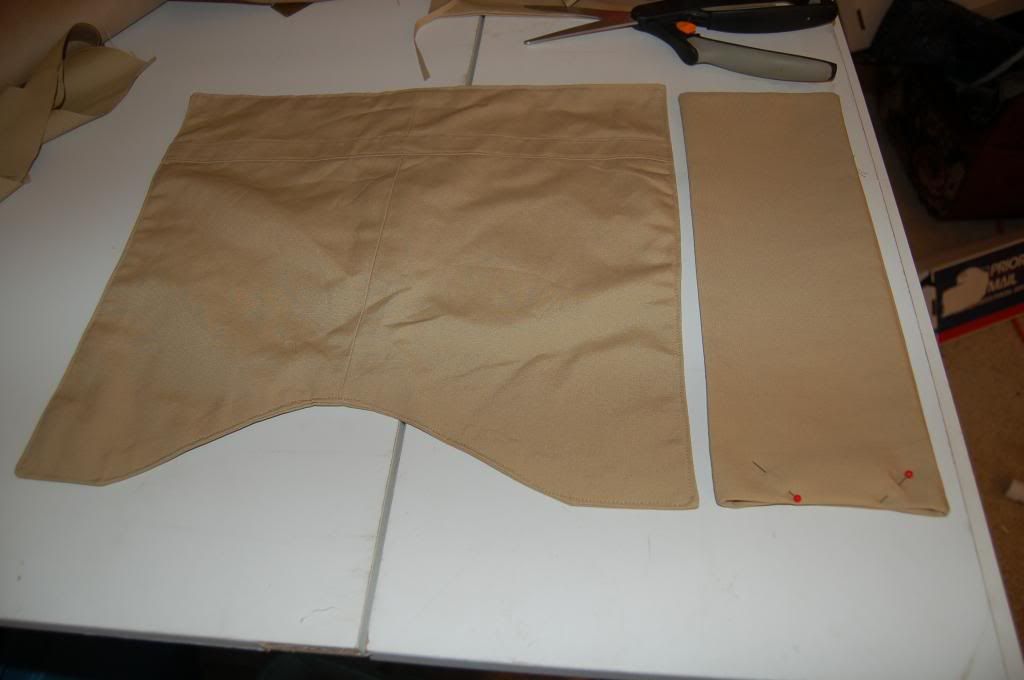
5. Press under 1/8" on long sides of strips.
6. Pin strip across front of each of the two gaiter pieces, about 3 inches down from the top.
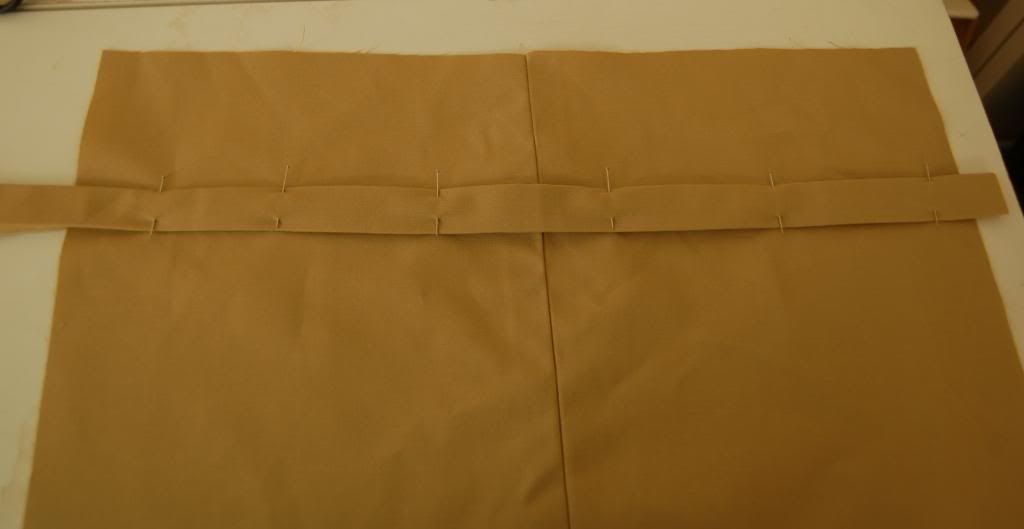
7. Sew down strips, stitching close to edges; trim ends.

8. Attach gaiter pieces to lining pieces, right sides together.
9. Stitch around outside edge, leaving a 3 inch opening in the back.
10. Trim corners and clip curves, especially around the lower, middle front.
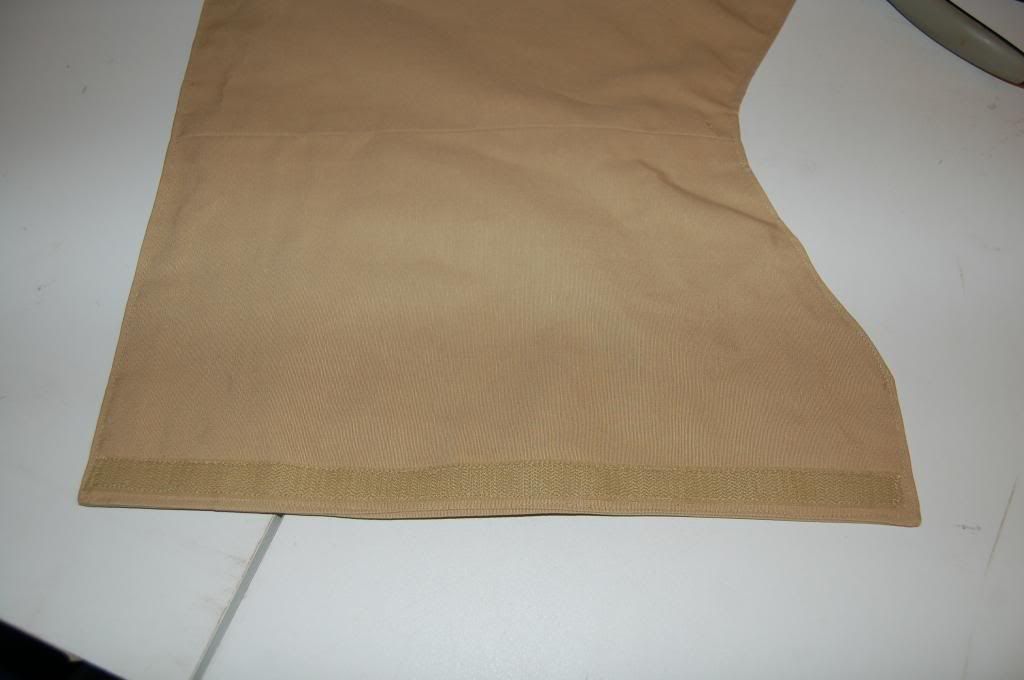
11. Turn right side out, and press.
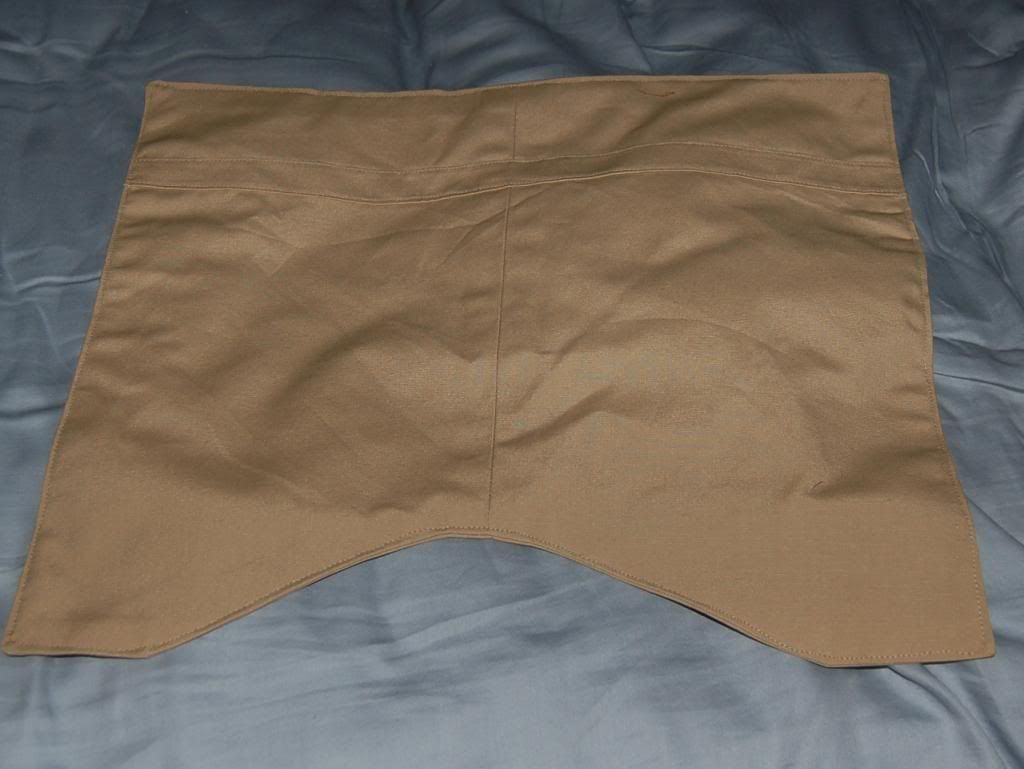
12. Top stitch close to outside edges.
You should now have two gaiters like this:
13. Sew the sides of the tongue piece, right sides together. (sew the top if you didn't cut on the fold)
14. Trim corners and turn right side out, press.
15. Check the length! Trim if needed. (It should come out the same, but if you used a different seam allowance, it may not. And it should be about 1/8" shorter top and bottom. Adjust it to look good!)
17. With the right side of the gaiter facing up, slide the tongue underneath about 3/4 of an inch. Top stitch through the gaiter and tongue, about 3/8' from the edge of the gaiter.
18. Sew the soft side of the Velcro to the tongue , near the edge of the gaiter.
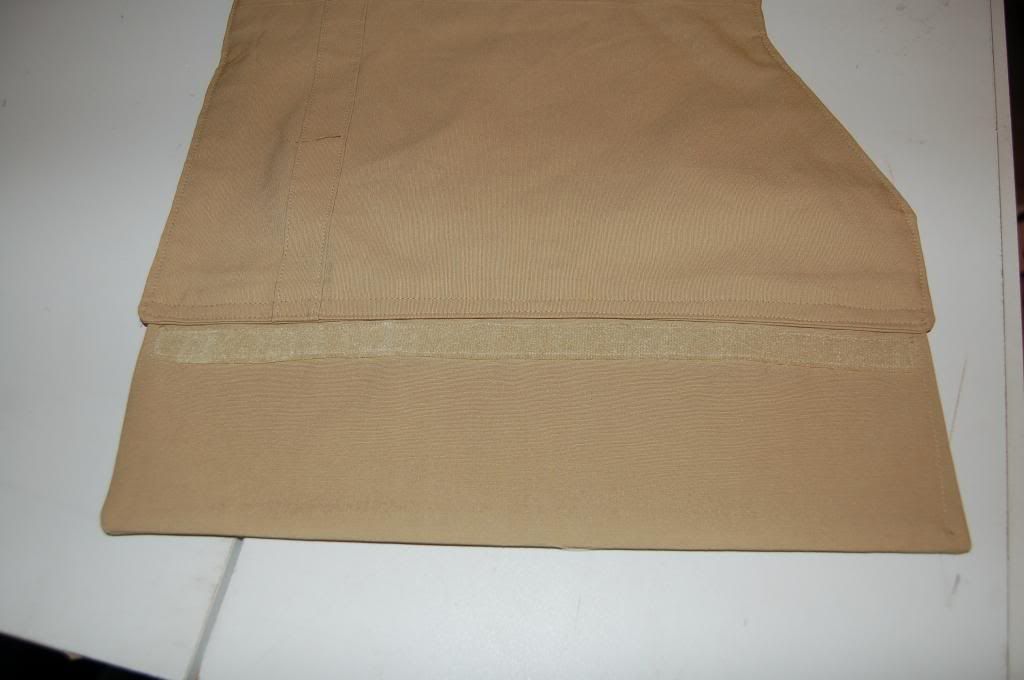
19. Sew the hook side of the Velcro to the wrong side of the gaiter's other back edge.
When fastened, the two edges should meet in the middle.


These are not difficult, and it takes less than two hours to do!
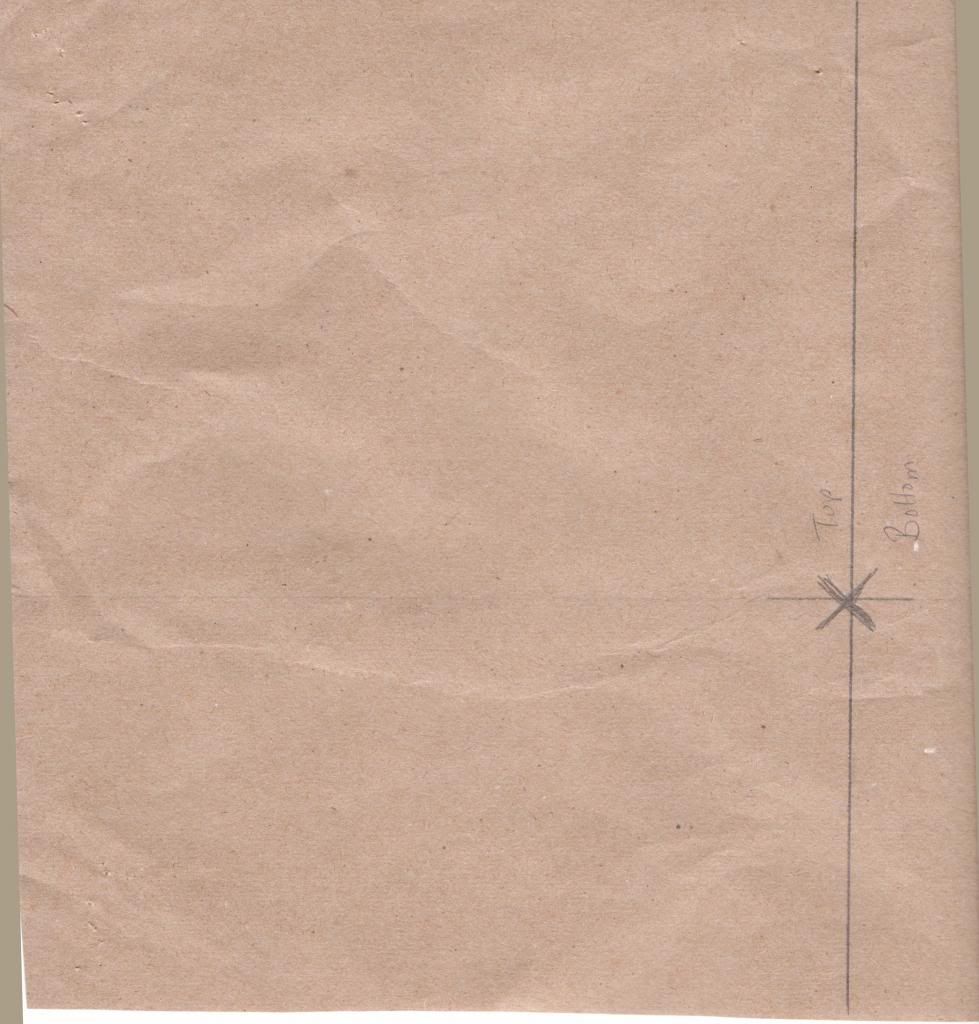
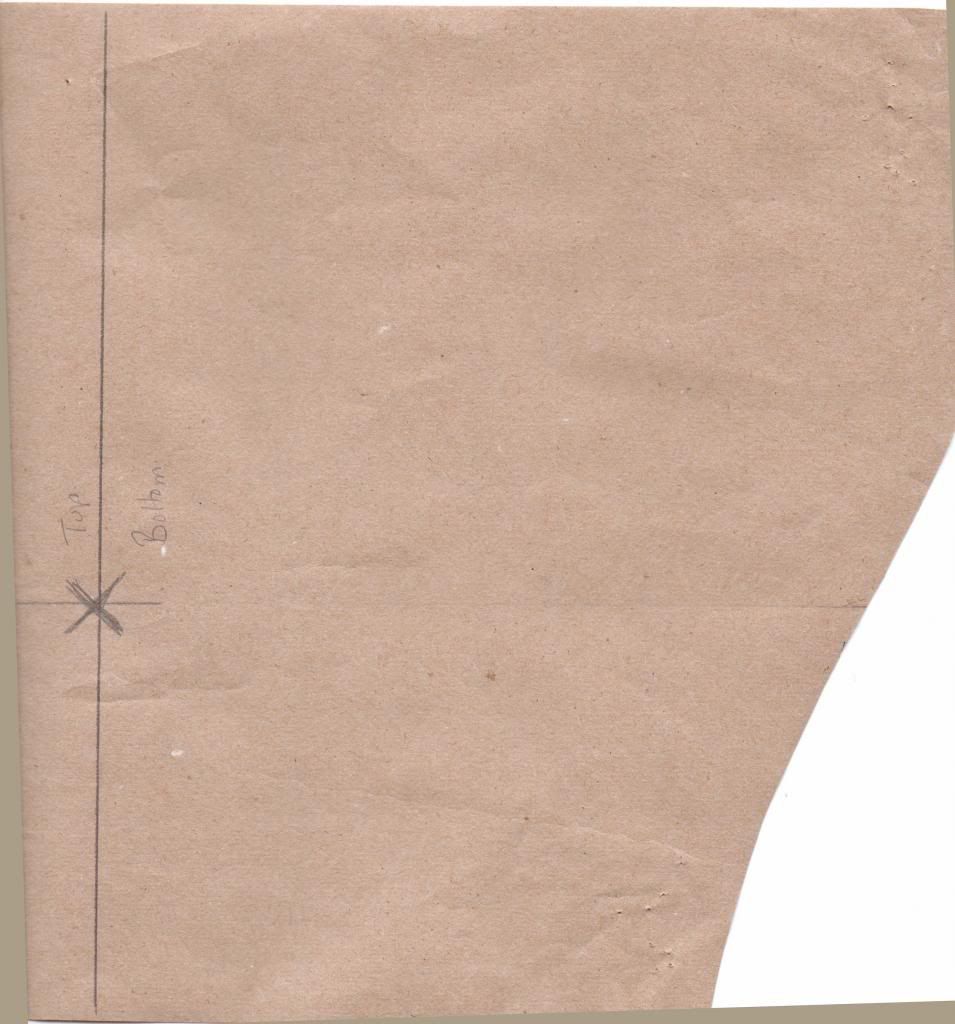
Pattern for gaiter piece:
http://i72.photobucket.com/albums/i184/granny-wan/costumes/Gaiters/top_zps785a9cc3.jpg
http://i72.photobucket.com/albums/i184/granny-wan/costumes/Gaiters/bottom_zps4d552370.jpg
Tape the pieces together, matching the lines across the middle. It should look like this:
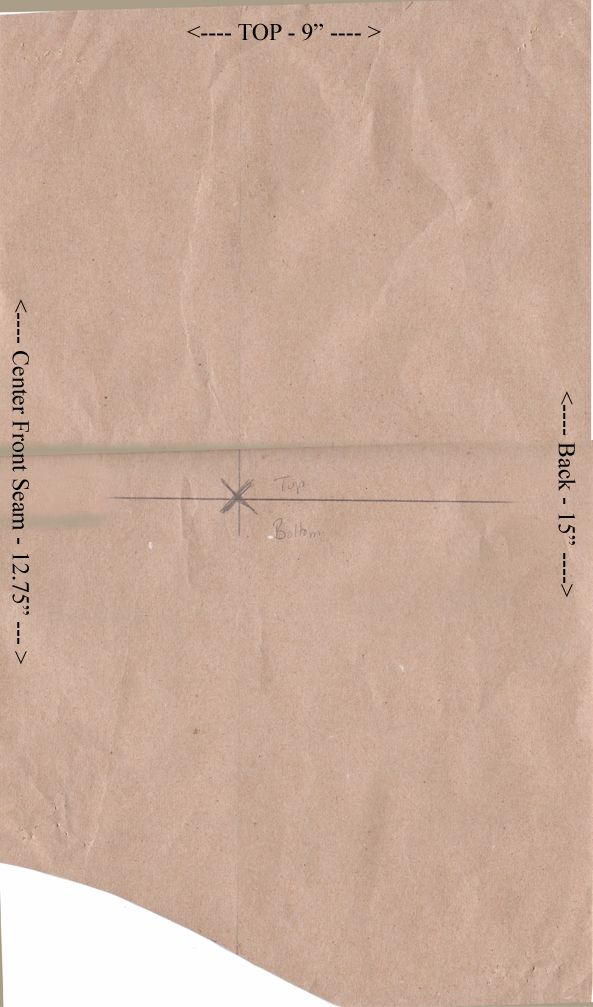
If it's too tall, you can shorten it at the top. The tongue pattern is just a rectangle, 15 inches long and 5 inches wide. The straps are 1.5 inches wide by the width of the gaiter. I cut mine about 18 inches and then trimmed the ends off.
Saturday, May 21, 2011
Trooper Troubles
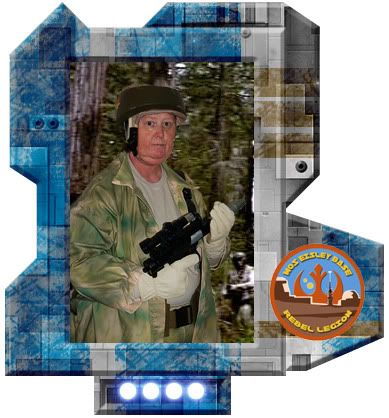
Endor Troopers are one of the coolest costumes in the Rebel Legion. Why? Because they are all different. Some have long coats, some short... some have vests, some have ponchos... some carry armament on a bandolier... some have big-ass rifles, while others took a weapon off a dead stormtrooper.
And... you get to wear a doughnut on your head. LOL
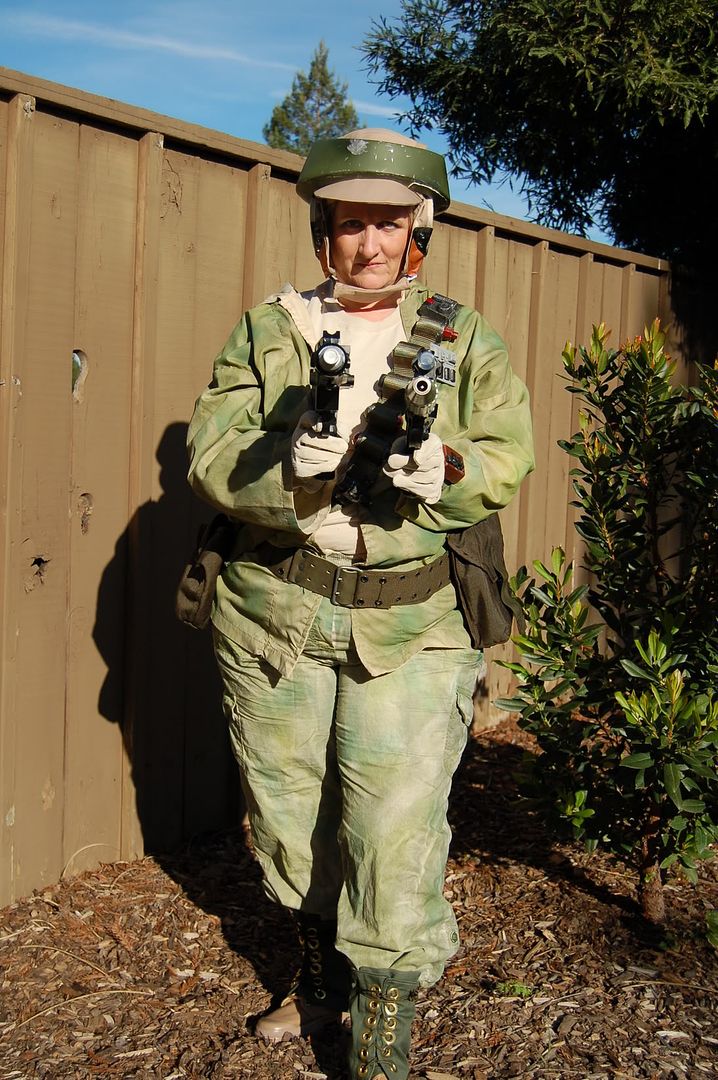
This is mostly a point-and-click costume if you like. You can order many of the parts online, and with some modifications you have most of a costume. We started Robin's costume with ready-made pants, a long sleeve T-shirt, leather gloves, and a doughnut.
The gaiters and the jacket were sewn by me. The first gaiters were too big but they found a home with someone else!
The helmet was a whole different adventure. RL members provided a pattern, and I made a rough mock-up, and ended up enlarging it some. The cap bills were stiffened by a piece of plastic cut from the lid of a salad box. The leather trim had to be cut, dyed and glued together.
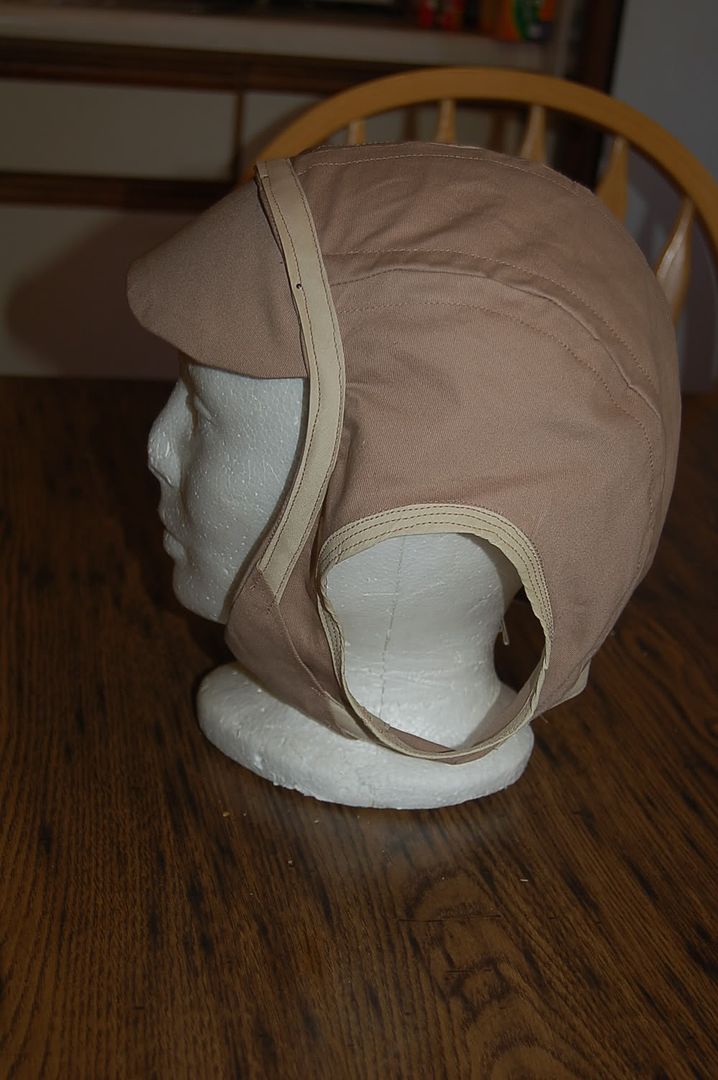
Attempts to make ear cups failed miserably, and I had to order vaccuformed ear cups from a prop builder. But he was a lucky find, and supplied mine as well as greeblies for both of us.
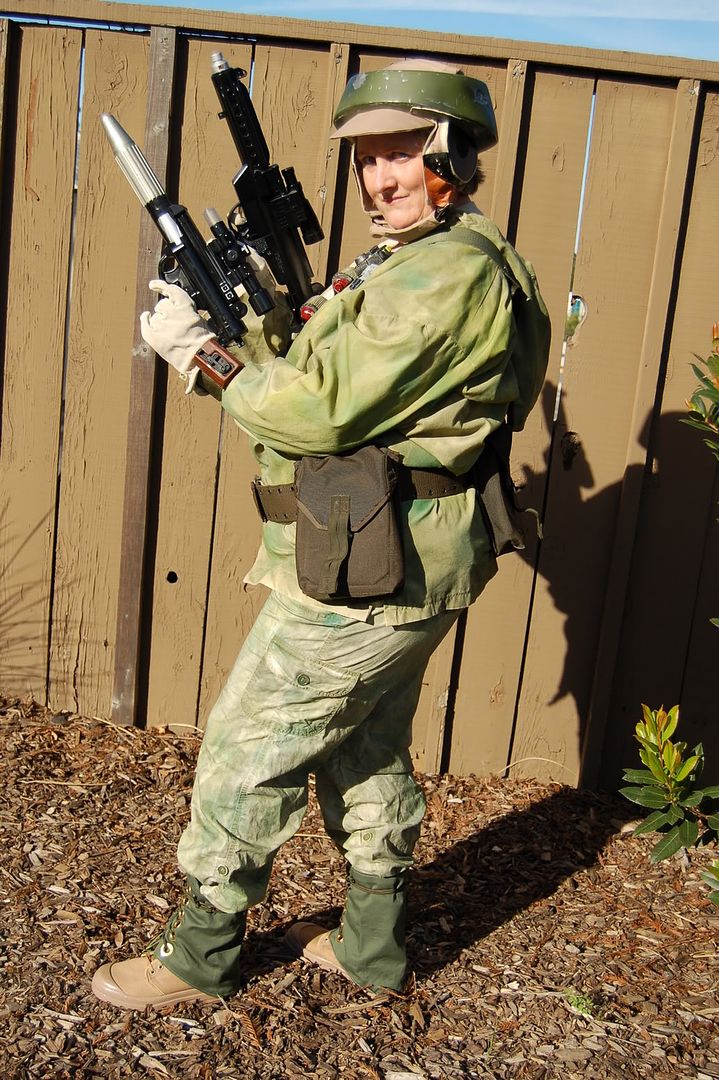
What are greeblies? They are the things that decorate various parts of costumes. They are widgets. They are things that are alien in appearance, but you can recognize their purpose. In this case, the greeblies are the items carried in the Endor Troopers' bandoliers. They could be grenades or ammo.

The greeblies had to be spray painted, and then decorated by hand painting. The bandoliers were made from olive drab webbing.
The most fun was spray painting the pants and jackets! Originally, I didn't put enough paint on Robin's, so we spent a couple of hours touching them up on her patio. She was even spraying with both hands. LOL I painted mine at my storage unit, determined not to make the same mistake again I used so much Moss Green that my finger wouldn't spray anymore and I had to use both hands!
I'm not posting any details here on how to make this costume, because it's already been done. If you're really interested in making one of these, I can point you in the right direction!
Saturday, June 5, 2010
THE SATINE SAGA

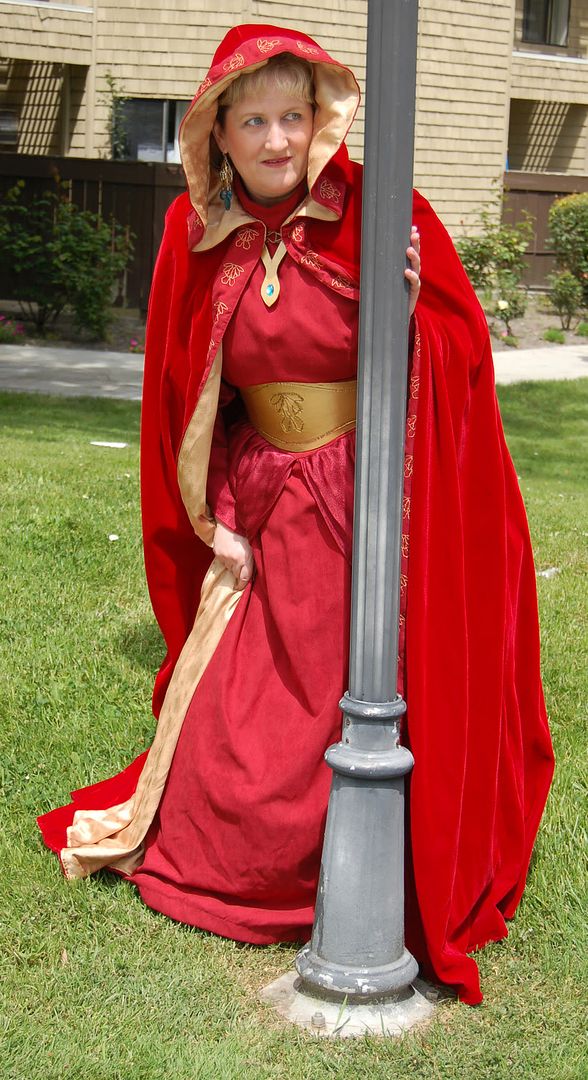
The Satine Saga is a much shorter story than the Luminara Chronicles. The huge trick to Satine was turning a cartoon character in to a real life character! Fabrics, and seams, and the vagaries of the human female shape do not limit cartoon artists.
All the credit for the fabrics goes to Robin, not me. All I said was, "Look at the Royalty Velvet Fire Engine Red, you'll love it" and the rest is history. Not without trouble in special ordering, though. But she also found costume suede cloth for the dress in a complementary shade of red. And to go even further, she found a silky fabric for the sleeves and drapes, and a matching gold silky solid for the lining.
When I opened the box of fabrics I thought they were so beautiful that I ought to take a shower before touching them... LOL
But I hated that lining. It was silky all right, and it slipped and slid all over the cutting table. Took me two tries to cut out the cape lining, and it never did match up correctly, in the end I was on the floor matching the bottoms up with a hand baste.
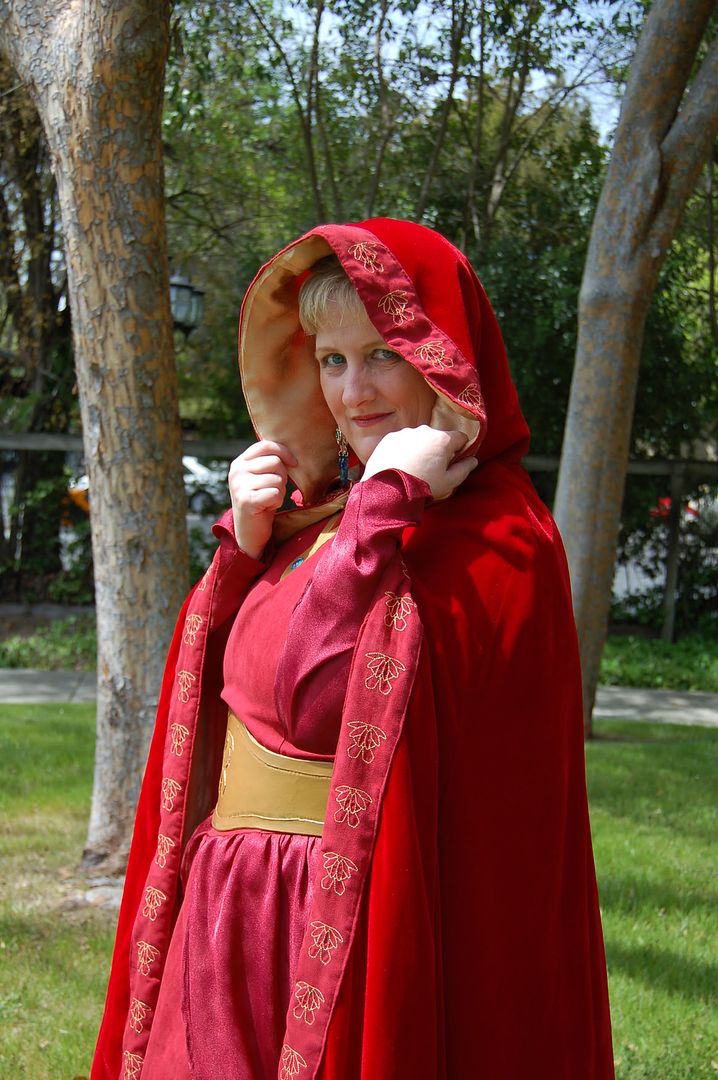
The embroidered motifs were done by a professional with a cool, computerized embroidery machine. All based on a sketch by Robin. All I did was make sure they were lined up in the front!
The cape was not the easiest thing to sew with that slippery lining, and with the double layer of fabric along the front edge.
The embroidered suedecloth along the front didn't want to stay still while I sewed it down. Everything wanted to slide to the left. I didn't know whether to curse the fabric or the sewing machine!
The dress went a bit easier, mostly because I made a muslin mockup first. I started with Simplicity 3723. view A, using the hip drapes from view C.
The first and most difficult alteration was the sleeves. They needed to be puffier below the elbow and then tight at the wrist. Took me a few tries, but I finally got it right.
The other alteration was to cut down the volume of the skirt. The pattern had two huge pieces called the "side back". I only used one, and lined up the side seams to help distribute the fullness evenly.
I also cut about 10 inches out of the center of the hip drapes.
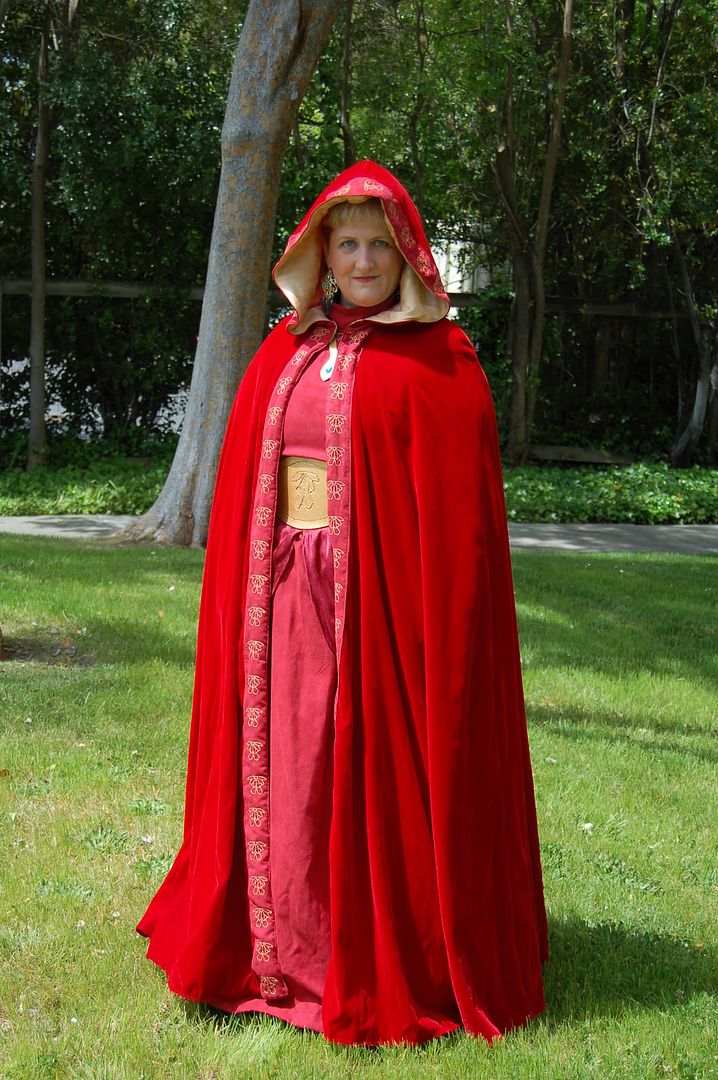
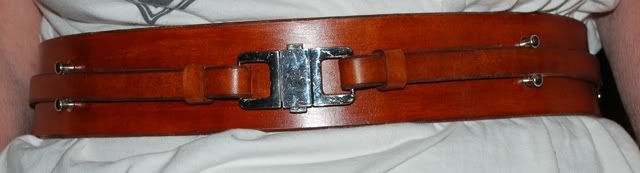
The belt was fairly easy; I made a paper pattern first and fit it to my dress dummy before cutting the leather. The motif I made by enlarging Robin's drawing in Photoshop until it was the proper size.


The cutting and carving was simple. I only used a smooth beveller to accent the design after it was cut.
The belt and the necklace leather was painted with gold Cova Color from Tandy Leather.
Robin herself found the hair comb and the beautiful earrings, and the spiffy red shoes to go with it.
All in all it was an interesting project, with a beautiful result!
Monday, April 5, 2010
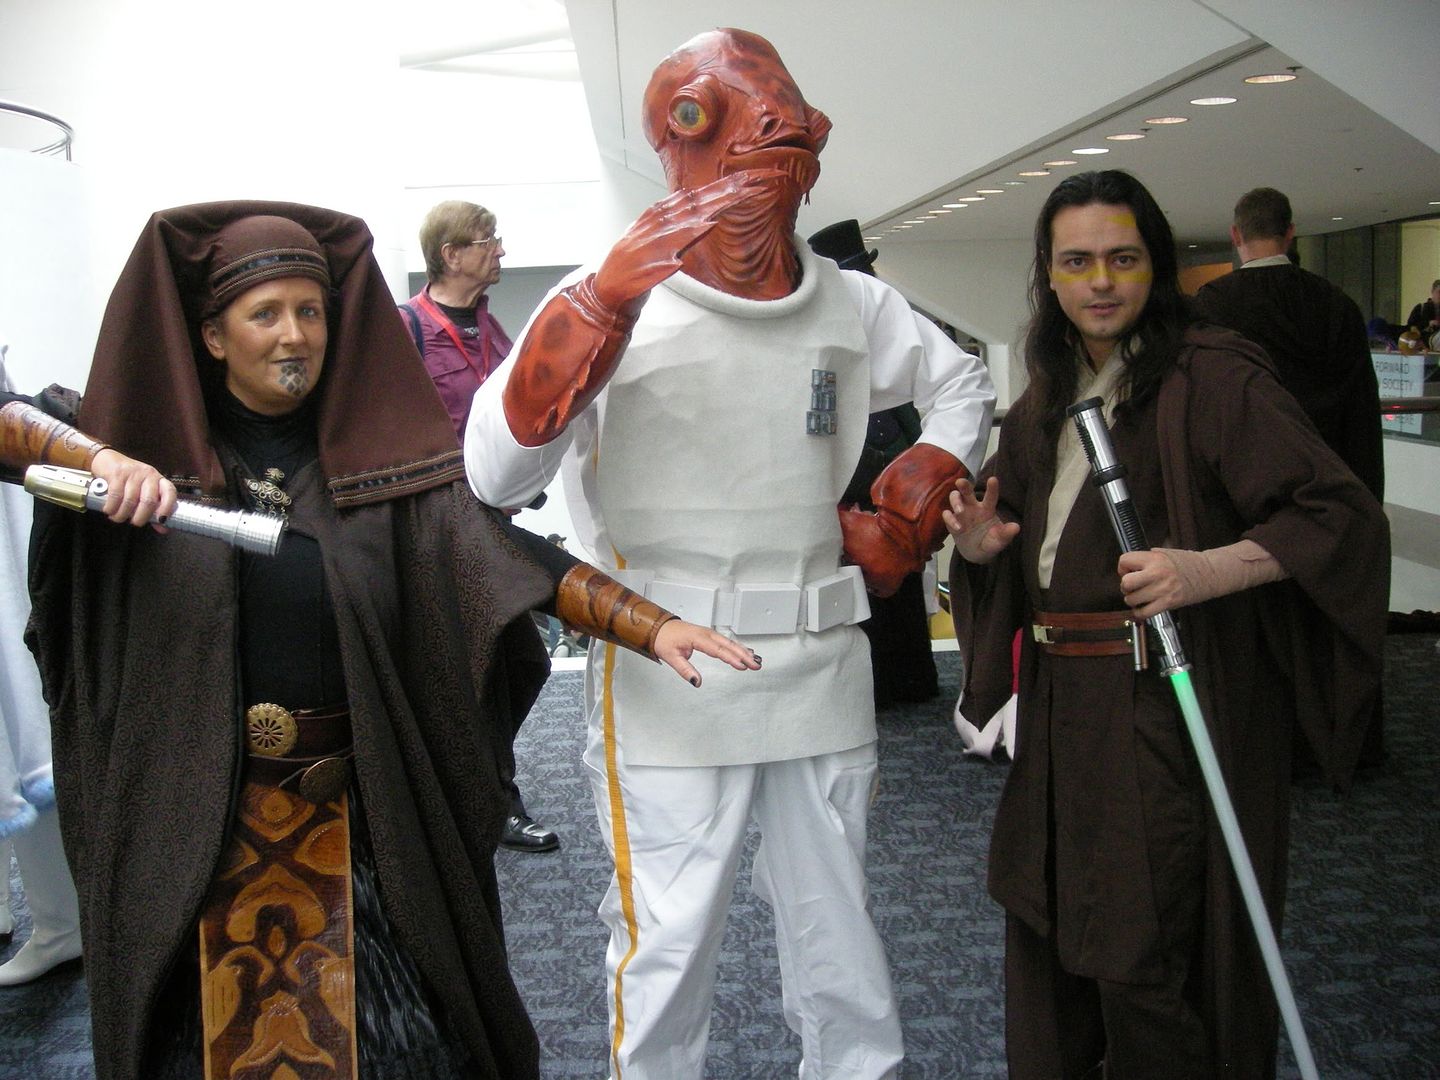
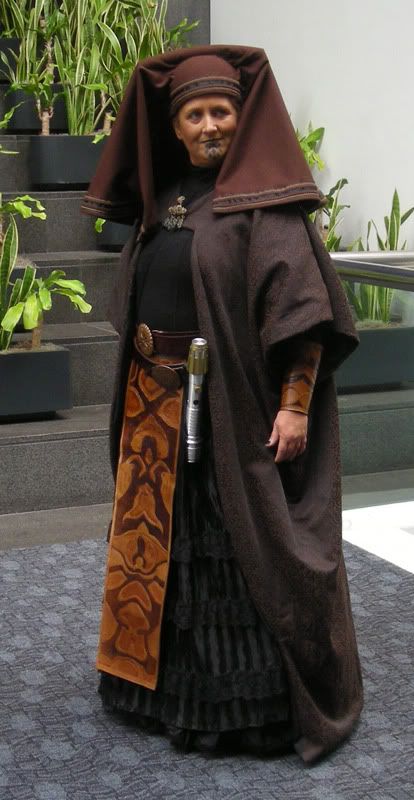
THE LUMINARA CHRONICLES

Chapter 1 - The Skirt
It started off innocently enough with the skirt. A simply gathered floor length skirt of black, pleated fabric with three rows of lace.
I found the perfect fabric in an outlet store in Tempe, AZ. I momentarily taken aback by the fact that it was the wrong side of the fabric I was admiring, since close examination proved it would work. Only Robin will know the inside of her skirt is shiny, disco gold striped...
So in June of 2008, I whipped up the skirt. I discovered the fabric was little fragile while trying to mark the sewing lines for the lace trim with tailor's chalk, so I used blue painter's tape instead!
Hey, it worked great and the lace went on straight. The next month I saw Robin, and she tried on the skirt. A tightening of the waist and a small hem adjustment later, the skirt was done! Woo Hoo!
Chapter 2 - The Petticoat
The skirt wasn't poofy enough on it's own, and all the patterns I saw for petticoats were like hoop skirts from the Civil War. So I searched the interent and found a pattern for the Time Traveler's Petticoat.
The directions made perfect sense.... An A-line top section, with a double gathered tier, followed by another doubled tier. Basic gathering techniques. I could do this.
Well, here's a word to the wise... not everyone's behind is suitable for an A-Line... in trying the petticoat on the dress dummy, it got stuck on the hips and I couldn't budge it up or down.
The fabric was so tight around the dummy's hips that I couldn't even reach in to adjust the dummy so the petticoat would slide off. A fight ensued, and the dummy went down with a struggle!
Finally, cooler heads prevailed and the petticoat was rescued from the clutches of the evil dress dummy and enlarged to fit.
Eventually the petticoat was scrapped in favor of a beautiful three-tiered piece from an online formal wear shop. Much better choice!
Chapter 3 - The Cloak
During the visit in July of 2008, Robin and I set off on a mission to a fabric outlet in San Francisco.
First we found what we thought would be the perfect fabric for the headpiece. More on that later. Then we searched every rack and shelf in the place looking for a floral brown on black to make the cloak.
And damn if we didn't find some... in the upholstery section! "It a couch!" she said, but it was too close to what we needed to pass it up.
Considering that I had no pattern to work with, and just an idea, it turned out rather well, although at first the front was too pointy. Eventually, I unsewed part of the lining, turned it inside out and rounded off the pointy corners and it looks really awesome.
In the meantime, in January '09, in a fabric outlet in Phoenix, I came across brown on black burnout velvet, and I just had to try it out. So another cloak, this one wider and with more gathers, was born.
Word to the wise: Burnout velvet has to be lined, but STRETCH velvet and non-stretch lining material just don't go hand in hand. After much swearing and adjusting the cloak was done. Ugh.
The couch cloak looks better anyway.
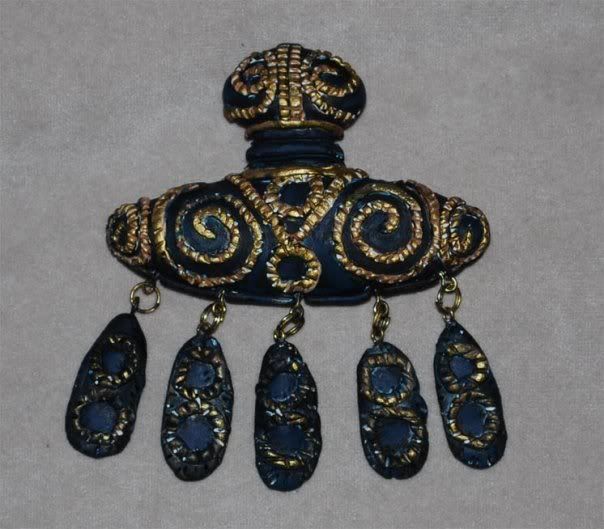
Chapter 4- The Brooch
It seemed simple enough, make a brooch out of Sculpy clay and gold wire and hang beads from it. I bought all the parts before I left AZ. By the time I was ready to try making it, the parts were nowhere to be found and I had to get new stuff. Note: I later found the original bag of materials in my scanner box. WTF?
My first pin turned out to look like an alien head. That's when I got the brilliant idea that maybe our friend and artist Neil Baker would like to try it. Smartest move I'd made so far. His turned out brilliantly, it was the right shape and his hand painting was spectacular!
Chapter 5 - The Big Book
The Big Book is "Dressing a Galaxy", a gorgeous, coffee-table type book that is the holy tablet of Star Wars costuming. It cost $50 new, and is out of print, so new copies are running upwards of $100. Robin offered to send me hers to use, as long as I treated it as my own. Her words, not mine. I had visions of torn dust jackets, bent corners, and other nasty things, so I quickly searched the internet and found a used, already beat up copy for $27. LOL
Robin's book remained safely in her possession and I'm free to abuse mine as needed, like dragging it into Tandy Leather.
Chapter 6 - Distractions
Meanwhile, I have other projects to finish. I made a black cloak for Robin's friend Julie, and a new cloak for myself in time for the premier of "Clone Wars" in August '08.
I made leather tabards for Robin. I tried to fix the leather tabards for Robin. Then I made new leather tabards for Robin.
I made belt pouches for both Robin and Julie.
I made a holster for a local member of the Rebel Legion.
I made an X-Wing pilot costume for Grampy-Wan.
I took a two-week vacation to Montana.
I spent three weeks working on PR materials for the Rebel Legion for Phoenix Comic Con.
I moved to Montana.
I designed and made Robin a "summer" Jedi costume, complete with tunic, sleeveless cloak, belt, and pouches.
So sure, there were unavoidable delays in the process. But as summer 2009 rolled out, I had the skirt, petticoat, shirt, and two cloaks done.
Chapter 7 - The Shirt
It took Robin a long time and a lengthy search to find the right shirt, but she found the perfect one. Not without trial and error. First we tried a Danskin tight, which barely fit on the dress dummy for me to make the markings of where to sew the trim. The she sent me the perfect turtleneck. The trim went on easily, and I started to make the tucks in the center front... only to discover that I sewed on the side section instead of the center. I tried to pick out the stitches and tore a hole in the shirt.
Quickly I went online and ordered a replacement! Whew! And it turned out great. A bullet dodged.
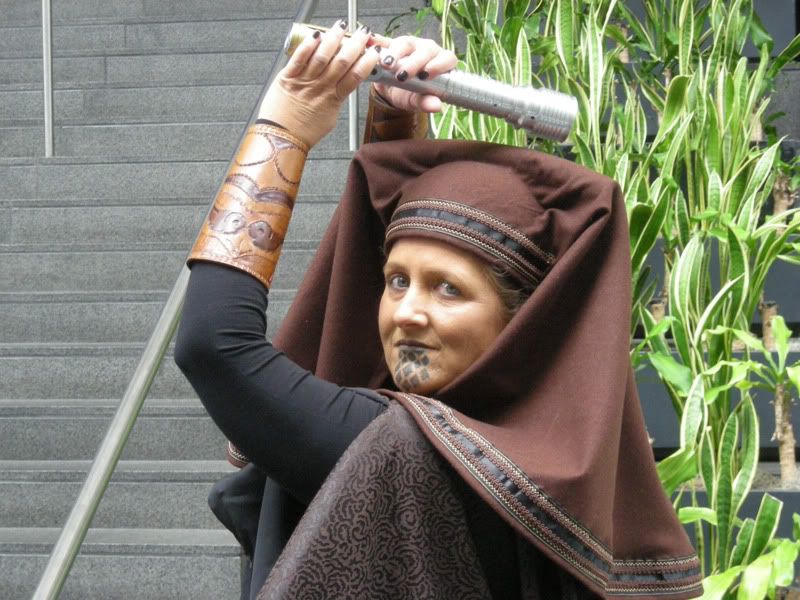
Chapter 8 - The Leather
Well, this started innocently enough, too. I found a nice, lightweight piece of cow leather at Tandy, big enough to make Luminara's items and a lot of other things out of. It was a half a cow, I think, and not a small cow, either.
First I made the belts. Easy enough, I got precut strips and after closely examining a picture online, I got a bottle of mahogany dye. Oh, they were beautiful! However, in examining the Big Book, we discovered they are NOT mahogany, but dark brown.
So I had to strip off the finish and re-dye them Java Brown. They look spiffy, so it all turned out OK.
I had test fit the leather cuff to Robin's arm using tissue paper, and I cut a test piece for practice. My cutting and tooling were way off, so I sent it to her to try on. It was WAY too big!
After a phone call discussion on the size of her arm, and a new pattern drawn by Neil, I cut another piece, which I cut and pounded into the proper pattern, or so I thought. But when it came time to shade the background, I realized that two swirls that were suppose to meet in the middle didn't meet, leaving me no clear place to start the shading. I decided to finish it for practice, and poked a hole in one place that it didn't belong. So that became practice piece #2. Fortunately, this one fit.
And also fortunately, after seeing my clumsy attempts at dyeing the first practice piece, Neil offered to paint the leather for us. WOO HOO! I can dye solid colors, but painting is not my thing.
So... I cut two new wrist guards, altered Neil's pattern, and finished them off in a decent amount of time.
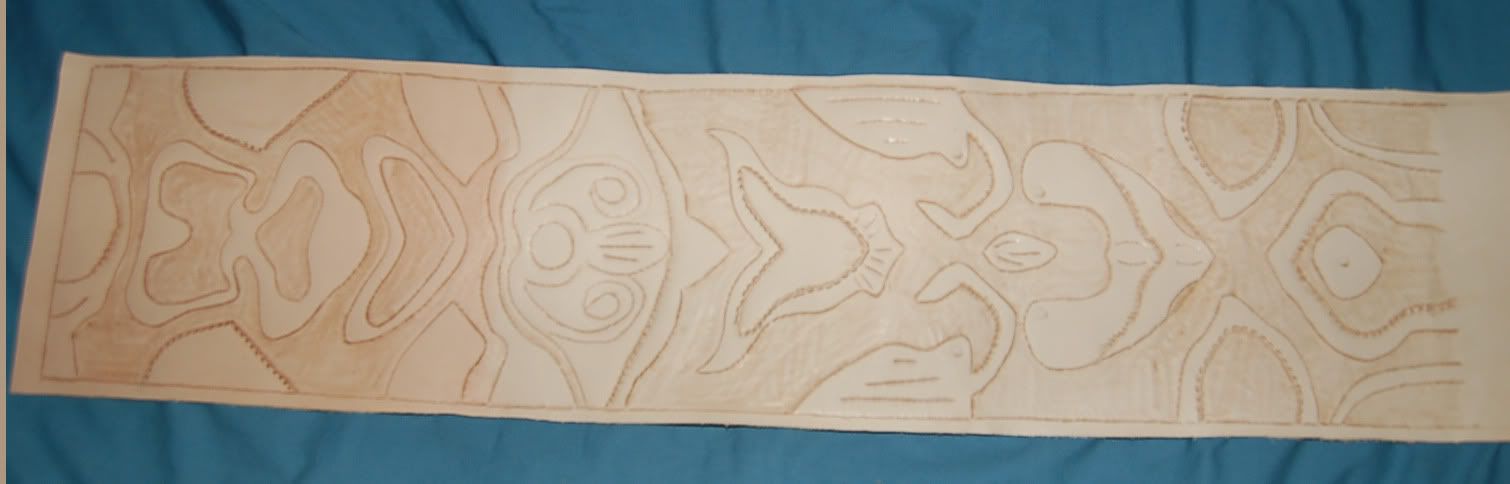
Now for the apron. I had a picture taken at an exhibit that I found online, and I blew it up in Photoshop and printed it out in grayscale. I marked the major lines on one side with a sharpie pen, and then scanned those pages in and flipped them to make each side symmetrical.
I made a beautiful traced pattern, cut the leather, transferred the markings and carved the lines all in one morning. I went from being totally unsure of myself to completely confident!
The next day I started the pounding, and after a momentary lapse of about 3 hours where I had the piece upside down, I finished it in a couple of days.
I shipped it off to Robin only to have her say, "Isn't is kind of small?" Well... yes, yes it was, when she held it up to the poofy skirt, it looked ridiculously small!
With the help of my scanner and Photoshop, I took my pattern and blew it up to 8 inches wide and printed it out again. Good proportions, and I made a new transfer sheet from it.
I cut a new piece of leather, and started over. First I stared at it on and off for two hours trying to see which end was the top... LOL
But in a week or so it was finished, and I shipped it off to her.
Halloween night I get a text message "you missed part of the shading on the apron LMAO"
Well, it's hard to chase two kids through the dark while trick or treating and text at the same time, so I replied back simply "crap".
But when it was returned to me, I finished it off properly, touched up a few spots and made sure everything was juuuuuust right.
Robin delivered the leather and dye to Neil personally, and when it was done it was bee-yooou-tiful, especially after I finished it off with Super Sheen finish. Shiny!
Chapter 9 - The Belt Buckles
One buckle came from Canada, and the other from Australia. The one from Australia was really a necklace, and almost got lost in the mail because the sender underpaid by fifteen cents...
One was too dark and the other too bright, she said... so I carried them into the hardware store to look for spray paint that was somewhere in the middle.
I sprayed them up, gave them some clear coat and thought they looked spiffy. Wrong! But once again, Neil came to our rescue and antiqued them to give them the bronze look they needed.
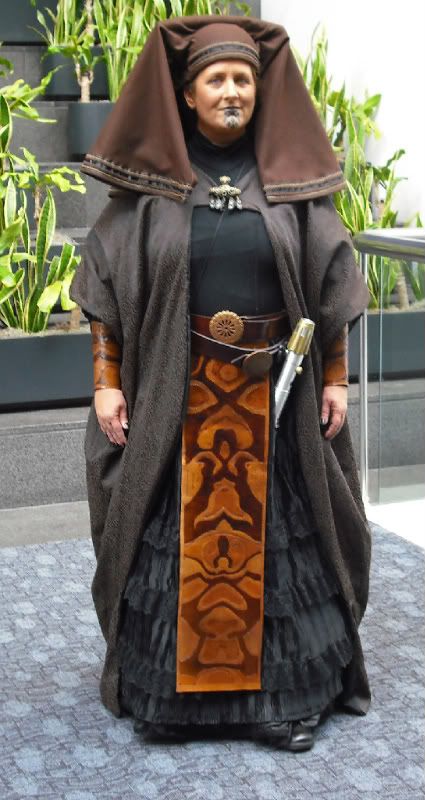
Chapter 10 - The Headpiece
Early on I had this crazy idea to use a bowl for the base of the headpiece, and I found a great one at the 99-cent store. Later I got a 1 foot piece of air tubing at Ace Hardware, and glued it to the top for the cross piece.
Using muslin, I test fit it on my daughter-in-law's head, and made a pattern for the fabric we'd bought in San Francisco. I had plenty of ribbon and braid from the outlet in Phoenix, so I was all set.
I cut the bowl in half, and hot-glued the air tubing to the bowl. I sewed the trimmings on the fabric, glued it to the bowl and Voila! A Luminara headpiece was born.
This is where I packed up all the parts and shipped them off to Robin, all except the leather. To her dismay, she discovered runs in the fabric on the front of the headpiece!
So, she packed the headpiece into a plastic bag and headed out to Joann fabrics to find some replacement fabric. She found the PERFECT wool fabric, a beautiful brown with the perfect texture.
She also went to Ace Hardware and bought glue. Upon returning home, she unpacked her treasures and while reaching into one bag she pulled out a 1-foot piece of air tubing.
"Why did I buy this?" she asked herself. And was about to put it in the stack of items for her plumber when she realized.... She'd pulled it off the headpiece!!! The whole framework just fell apart.
So, she sent that back to me along with the fabric, ribbon and trim.
This time, I got Grampy-Wan's help and he drilled holes in the bowl and used nuts and bolts to attach that air tubing. It's not going anywhere, he assures me.
I used muslin and made a new pattern, and after two tries I cut the wool.
I used some trimming that I had to make a test piece of trim, which I scanned and emailed to Robin, which made her laugh so hard she had to close her office door.
After a phone call, I made her a sample of all the embroidery stitched my sewing machine can do, and we decided on one. A new sample was made, and it was SHINY!
Then she decided she wanted gold thread on it, which she sent me right way, and she was right, it was super shiny.
I measured the lengths that needed to be trimmed, and started in on the front piece. I finished it and attached it to the fabric in one afternoon, taped it to the form and took a picture.
It was so puurrrty that we posted it on Facebook.
Then I stitched the black ribbon and the gold embroidery on the long piece, the one that trims the bottom of the veil. Then I began pinning it into place on the fabric and came up 4 inches short!!!!!!
So, there was a two-week delay until I could get to Joann's for more ribbon... Gluing it onto the bowl was nerve-wracking, and I tried to match "The Big Book" as best I could, but it just wasn't quite the look Robin wanted.
Neil, who has a more steady hand and more patience, did a little more gluing and gave it a look more like TCW Luminara, and it looks great!
Chapter 11 - The Makeup
Makeup was not my responsibility, but I have to relate the story of the Great Makeup Delivery...
After agonizing over color choices, Robin ordered the perfect shades of theatrical makeup and black and silver lipstick to complete the Luminara look. The company shipped it out to her via Fed Ex, who wouldn't deliver without a signature. So, she signed the delivery ticket and expected to find it on her front porch the next evening.
Well, the next night there was no package, but Fed Ex claims it was delivered. WonderCon, the planned debut of the costume, was coming up fast and she was without makeup... a series of panicked text messages followed, but lo and behold the next morning she found the package!!!! In the backyard.... WTF?
Chapter 12 - WonderCon 2010
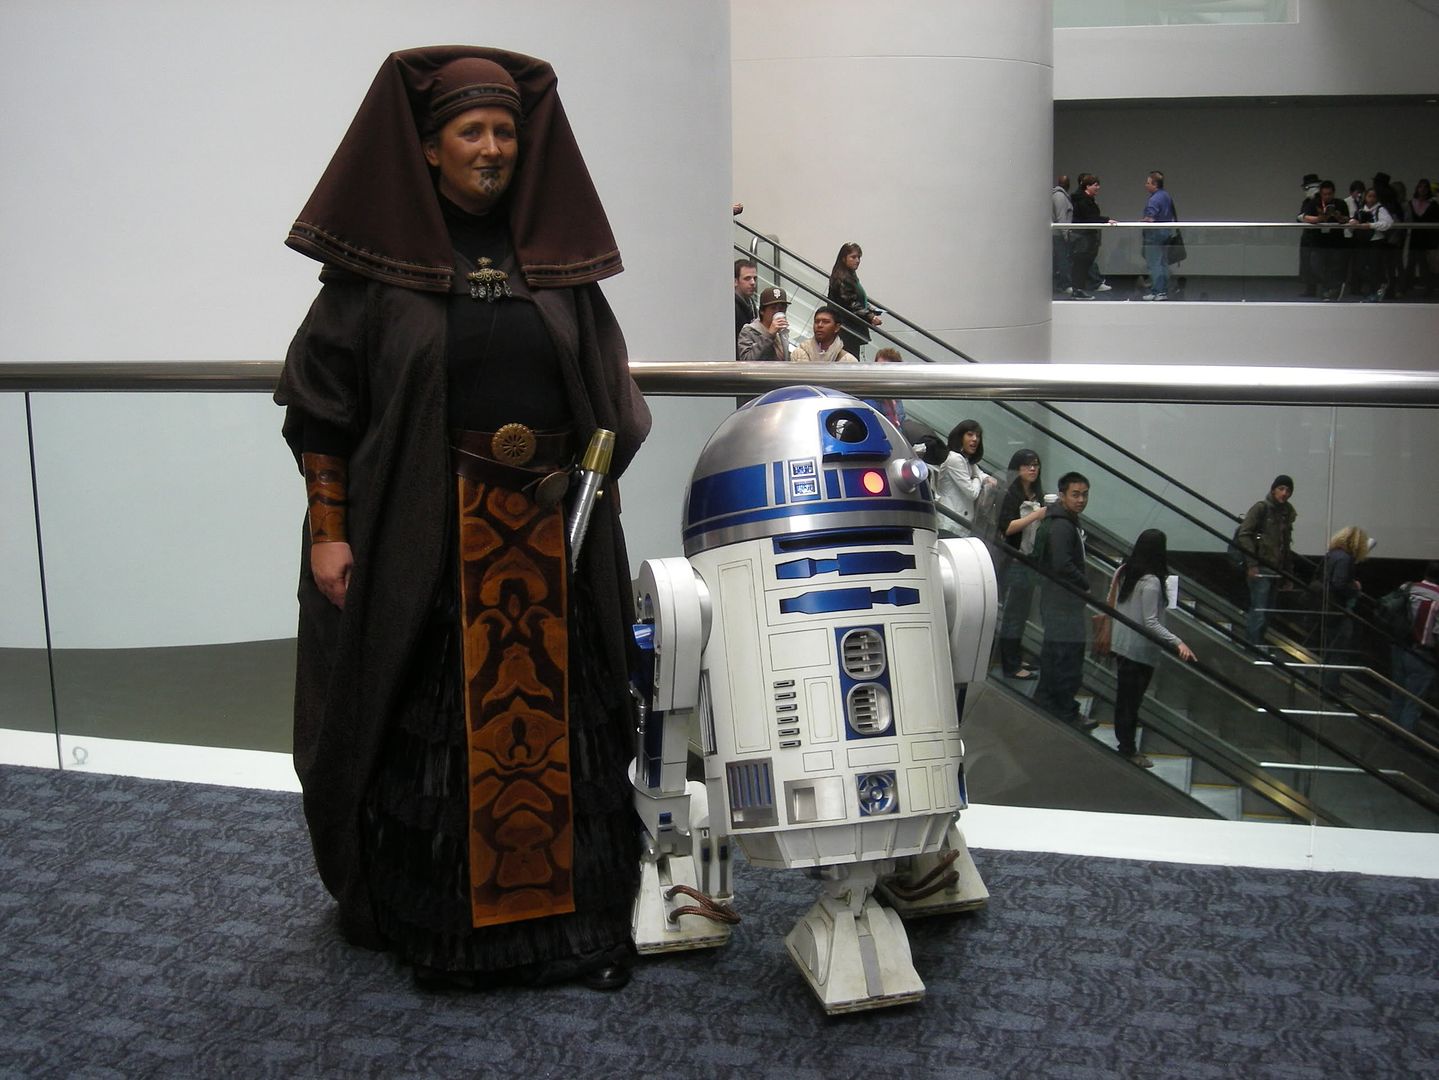
THE GREAT COSTUME ROLL-OUT!
It went well. It was awesome. I wasn't even there and I thought it was awesome! Robin received much admiration and awe from total strangers... lol
The Luminara Era is done! Long live Luminara!


Sunday, January 4, 2009
Rebel Pilot - Introducing Womp Rat 5!
Yes, Grampy-Wan is now a Rebel Pilot! And he looks damn good, too.
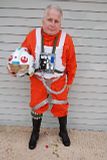
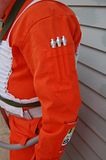
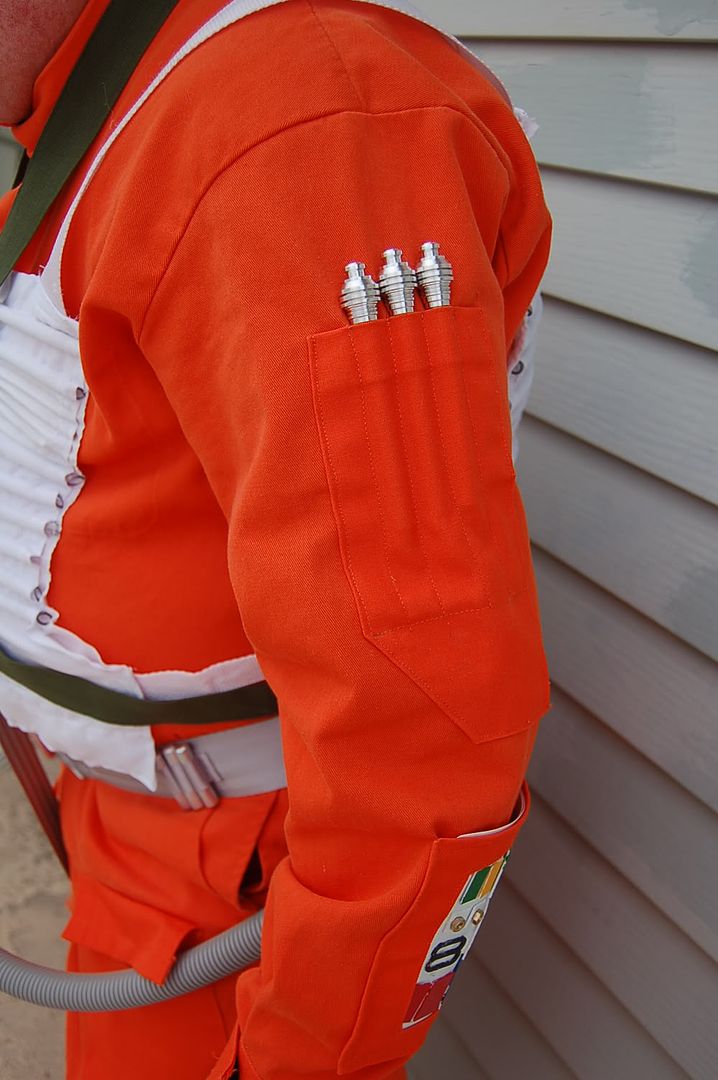
I started with an orange jumpsuit, and scraps from another. I added thigh pockets, arm pockets, and changed the collar and wrist cuffs.
The collar needs to be a stand up version, closed with velcro. The cuffs on the wrists also close with velcro.
The vest was a NIGHTMARE! I think I ripped out as many stitches as I put in! The first time he wore it I spent all day pushing the tubing back into the channels, so I stitched across the ends.
The arm tools came from Kenny the Elvis Trooper, and they look fantastic.
Also fantastic is the chest box, from Mr. Bojangles of the RL.
The helmet was Grampy-Wan's own personal nightmare, as the spray paint bubbled up and the whole thing had to be sanded. But eventually it smoothed out, and we decorated it by printing logos out on clear stickers and trimming them to fit.
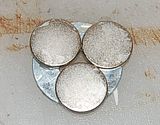
Grampy made his own leg flares by sanding the edges of 4" pieces of dowling and I spray painted them... always wear gloves when spray painting things that roll, because the force of the spray will send them skittering...
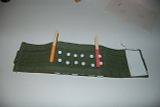
The leg flare holder was simple. I used green canvas-like material, one piece 7 inches wide and one piece 4 inches wide. After turning the edges under 1/2" on each side, they were 6" and 3". I the sewed the narrow piece onto the wide piece, fitting the flares in as I went along.
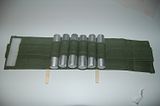
On the backside, I glued popsicle sticks which extend beyond the edge to tuck into the boots to keep the whole thing from sliding. I also secured the dowels with thumbtacks.
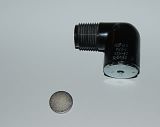
The chest box hose is attached to the side of the jumpsuit by magnets. The elbow, (a 'street elbow' in hardware store language) has a washer epoxied into it, and inside the jumpsuit is another washer with three neomydium magnets epoxied to it. Fits tight,but will slide if bumped instead of tearing the fabric!
Most of my thanks go to Alpha Base of the Rebel Legion for their great tutorials!
More pictures to follow!
And stay tuned for "The Luminara Chronicals"!!!
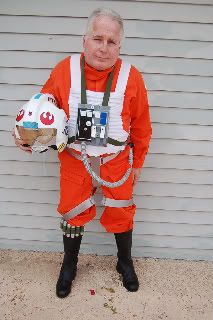
I started with an orange jumpsuit, and scraps from another. I added thigh pockets, arm pockets, and changed the collar and wrist cuffs.
The collar needs to be a stand up version, closed with velcro. The cuffs on the wrists also close with velcro.
The vest was a NIGHTMARE! I think I ripped out as many stitches as I put in! The first time he wore it I spent all day pushing the tubing back into the channels, so I stitched across the ends.
The arm tools came from Kenny the Elvis Trooper, and they look fantastic.
Also fantastic is the chest box, from Mr. Bojangles of the RL.
The helmet was Grampy-Wan's own personal nightmare, as the spray paint bubbled up and the whole thing had to be sanded. But eventually it smoothed out, and we decorated it by printing logos out on clear stickers and trimming them to fit.
Grampy made his own leg flares by sanding the edges of 4" pieces of dowling and I spray painted them... always wear gloves when spray painting things that roll, because the force of the spray will send them skittering...
The leg flare holder was simple. I used green canvas-like material, one piece 7 inches wide and one piece 4 inches wide. After turning the edges under 1/2" on each side, they were 6" and 3". I the sewed the narrow piece onto the wide piece, fitting the flares in as I went along.
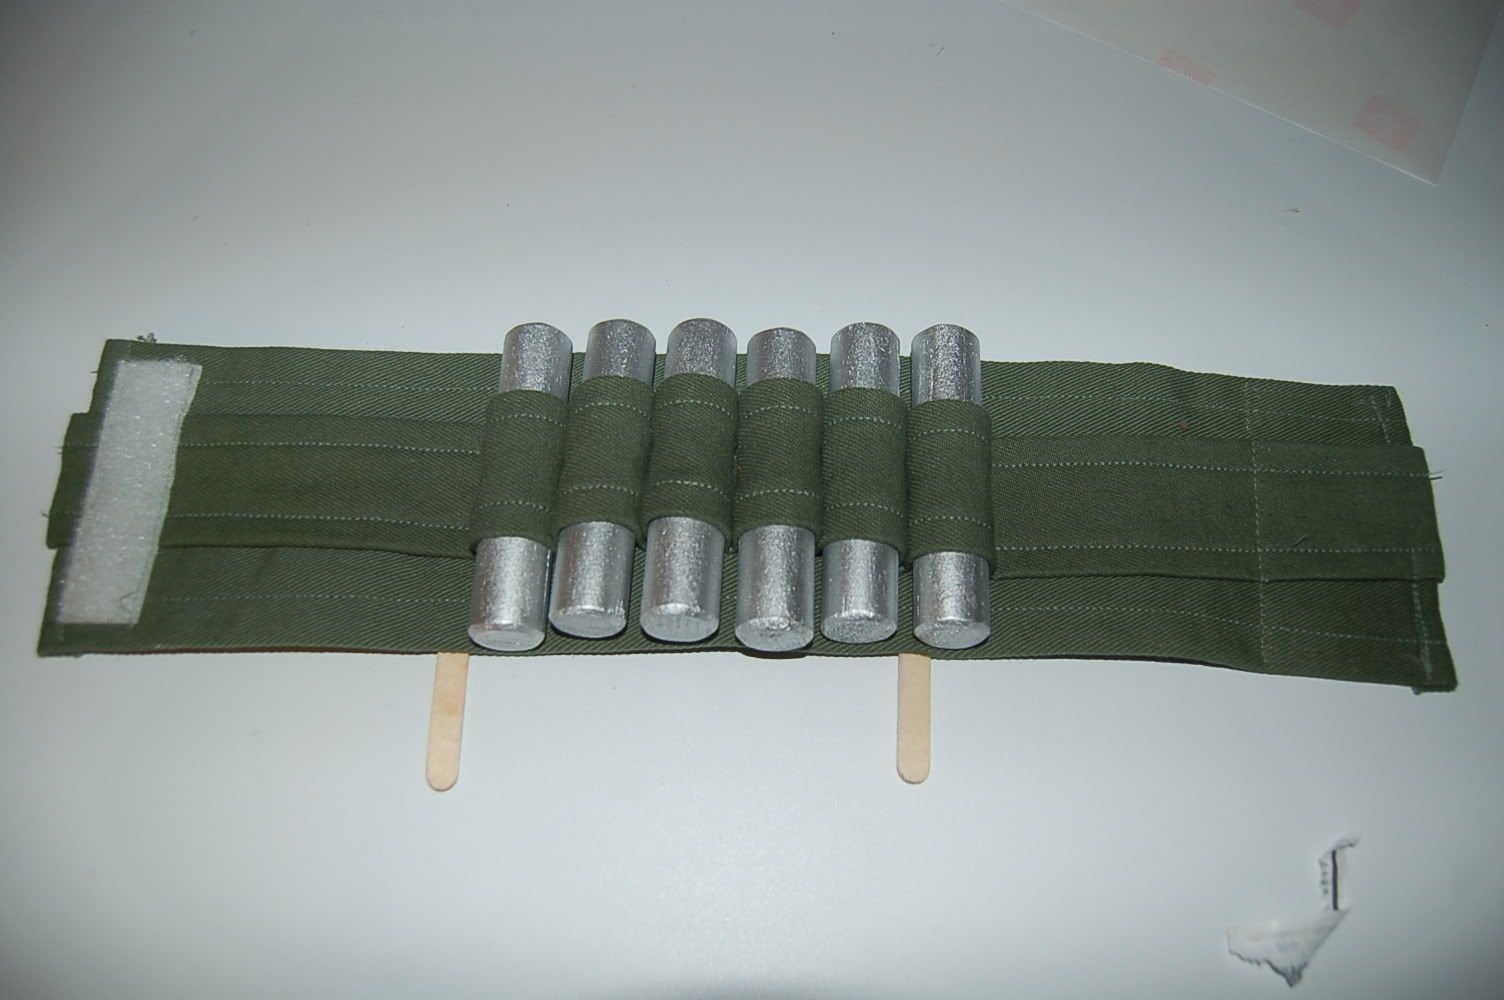
On the backside, I glued popsicle sticks which extend beyond the edge to tuck into the boots to keep the whole thing from sliding. I also secured the dowels with thumbtacks.
The chest box hose is attached to the side of the jumpsuit by magnets. The elbow, (a 'street elbow' in hardware store language) has a washer epoxied into it, and inside the jumpsuit is another washer with three neomydium magnets epoxied to it. Fits tight,but will slide if bumped instead of tearing the fabric!

Most of my thanks go to Alpha Base of the Rebel Legion for their great tutorials!
More pictures to follow!
And stay tuned for "The Luminara Chronicals"!!!
Wednesday, June 4, 2008
NOMI SUNRIDER COSTUME REFERENCES
NOT YET APPROVED!
REFERENCES:
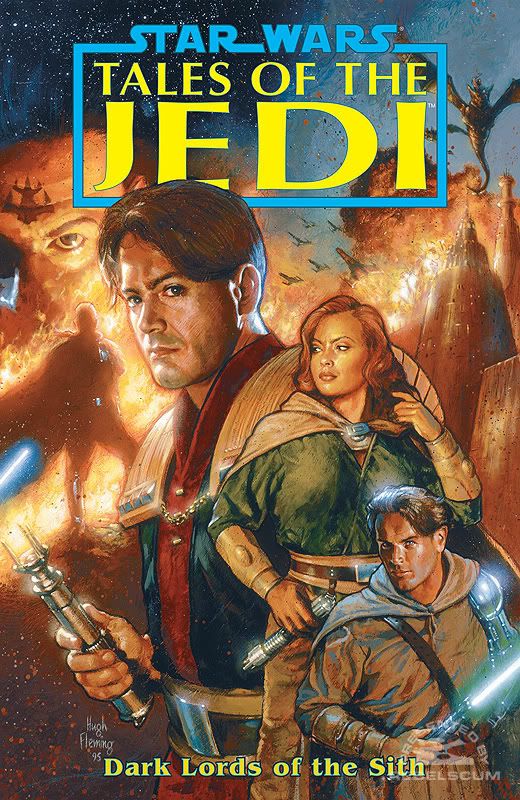
Nomi appears in this costume on a couple of covers of Dark Horse Comics' "Tales of the Jedi" series. Click on thumbnail for a larger image.
"The Sith War #4 of 6"
Dark Lords of the Sith #5 of 6

This image is also from the comics series, and shows Nomi with her sleeves rolled up and without the leather wrist gauntlets.
Nomi is also wearing this same outfit in the Star Wars Epic Duels Boardgame.
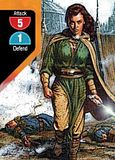
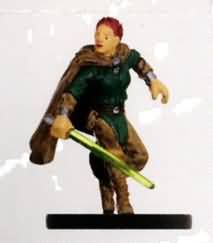
She appears again in the Star Wars Miniatures game "Legacy of the Force"

Nomi's lightsaber is a simple tube, with the only control being an activation switch. It has a simple ridged, round pommel, and a similar shaped emitter.
REFERENCES:
Nomi appears in this costume on a couple of covers of Dark Horse Comics' "Tales of the Jedi" series. Click on thumbnail for a larger image.
"The Sith War #4 of 6"

Dark Lords of the Sith #5 of 6
This image is also from the comics series, and shows Nomi with her sleeves rolled up and without the leather wrist gauntlets.

Nomi is also wearing this same outfit in the Star Wars Epic Duels Boardgame.

She appears again in the Star Wars Miniatures game "Legacy of the Force"
Nomi's lightsaber is a simple tube, with the only control being an activation switch. It has a simple ridged, round pommel, and a similar shaped emitter.
Saturday, March 15, 2008
MARA JADE'S LONG GREEN DRESS
For Mara Jade's long green dress, I started with McCall's pattern M9456.
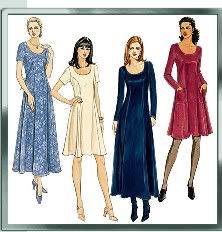
using the version shown in dark blue. I made the sleeves larger and puffier by adding about 3" extra into the center of the sleeve.

While sewing the sleeve into the dress, I gathered the extra material in between the notches, so it is still smooth under the arms.
I cut off the hem allowance of the sleeve, and instead made a cuff to fit my wrist, with enough to overlap for a button or a snap. I turned under the edges of the sleeve seam allowance to make the cuff opening, and gathered the bottom of the sleeve into the cuff to fit around my wrist, so that the edges come together smoothly.


The only problem with this pattern, is the neckline is too low. The shoulder armor is OK on the right shoulder, but on the left it doesn't fit correctly. If the shoulders were wider, so that the silver part and the green part met at the neck, I think it would look better, not to mention be more comfortable!
I did start the overskirt with a pattern, but it was not of much use. Basically, the skirt is made of three rectangles.
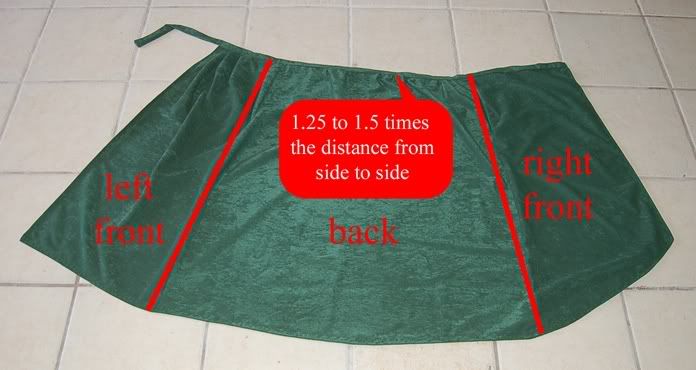
The back rectangle should measure about 1.25 to 1.5 times the width of your back at the waist, depending on how much gathering you want.
The top of right front piece should be as wide as half the distance from the side seam to your belly-button. The bottom width should be the distance from the side seam to the center front. The bottom should be curved so that it is shorter at the center front.
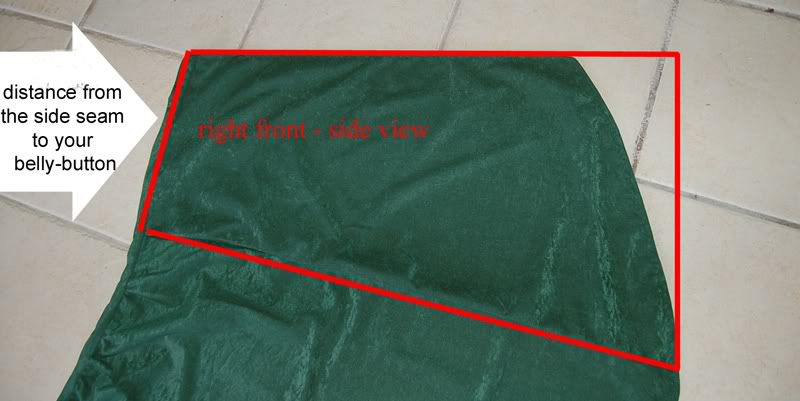
The center front is then angled from the top corner to the bottom corner.
The left front side should be a rectangle as wide as the right side is at the top. This part is gathered or pleated as much as possible from the side seam towards the center.
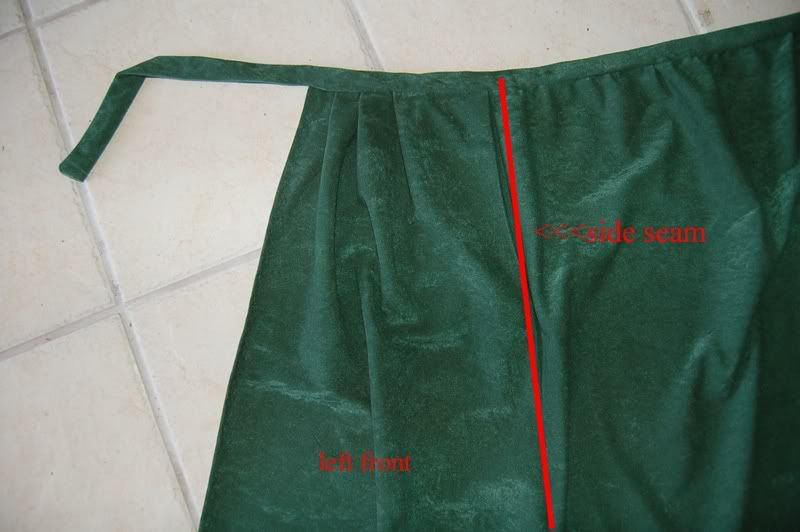
The top band is just a long strip of fabric sewn to the skirt and then folded over. It will be hidden under the leather belt, but it should lie as flat as possible. Then the ends of the strip over lap in the front and can be pinned or snapped closed. The entire edge of the overskirt has to be hemmed.
using the version shown in dark blue. I made the sleeves larger and puffier by adding about 3" extra into the center of the sleeve.

While sewing the sleeve into the dress, I gathered the extra material in between the notches, so it is still smooth under the arms.
I cut off the hem allowance of the sleeve, and instead made a cuff to fit my wrist, with enough to overlap for a button or a snap. I turned under the edges of the sleeve seam allowance to make the cuff opening, and gathered the bottom of the sleeve into the cuff to fit around my wrist, so that the edges come together smoothly.


The only problem with this pattern, is the neckline is too low. The shoulder armor is OK on the right shoulder, but on the left it doesn't fit correctly. If the shoulders were wider, so that the silver part and the green part met at the neck, I think it would look better, not to mention be more comfortable!
I did start the overskirt with a pattern, but it was not of much use. Basically, the skirt is made of three rectangles.

The back rectangle should measure about 1.25 to 1.5 times the width of your back at the waist, depending on how much gathering you want.
The top of right front piece should be as wide as half the distance from the side seam to your belly-button. The bottom width should be the distance from the side seam to the center front. The bottom should be curved so that it is shorter at the center front.
The center front is then angled from the top corner to the bottom corner.
The left front side should be a rectangle as wide as the right side is at the top. This part is gathered or pleated as much as possible from the side seam towards the center.

The top band is just a long strip of fabric sewn to the skirt and then folded over. It will be hidden under the leather belt, but it should lie as flat as possible. Then the ends of the strip over lap in the front and can be pinned or snapped closed. The entire edge of the overskirt has to be hemmed.


